Imagine you need to create a PowerPoint presentation but you are plagued with one or a combination of the below problems:
- You aren’t very well versed in the use of PowerPoint
- You don’t have PowerPoint installed on the computer you are using
- You have very little time to put a presentation together
Now suppose you have one or more of these things working to your advantage:
- You are fairly comfortable working with Microsoft Word
- You have Microsoft Word installed on the computer you are using
- You can make or have an existing outline that will serve as a guide for building the PowerPoint presentation
PERFECT!!! You’re 90% of the way to a finished PowerPoint presentation.
Step 1 – Create the outline in Microsoft Word
Note: If you already have an existing outline, you can skip to Step 2 – Applying Styles.
Write your outline in a form similar to the example below, where the title of the slides are listed at the parent-level, and the items that will serve as the slide content are listed below as child items (indentation is not necessary; it is only displayed here for clarity.)

Step 2 – Apply Styles
Select a parent-level item and click the Heading 1 style selection from the Styles group on the Home ribbon. Repeat this step for each of the parent-level items.
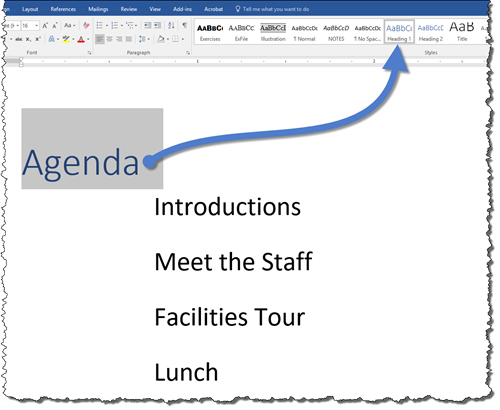
Select a group of child-level items and click the Heading 2 style from the Styles group on the Home ribbon. Repeat this step for each of the child-level items.

Perform this same operation, but with the Heading 3 style, for any 3rd level (grandchild items) that may exist in your outline.
Step 3 – Save the outline as a Word document
Save your Word outline and close the file. PowerPoint cannot read the file if it remains open by the authoring application.
Step 4 – Import the Word outline into PowerPoint
Start PowerPoint and begin with a blank presentation.
From the Home ribbon select the lower part of the New Slide button in the Slides group and select Slides from Outline… located at the bottom of the menu.
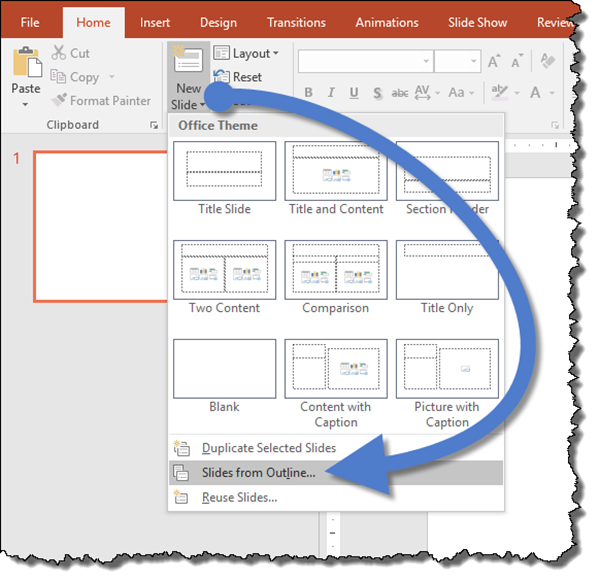
Navigate to and select the Word document containing the outline from the previous steps and select Insert.

All of your slides have been created using the Word outline as source material.
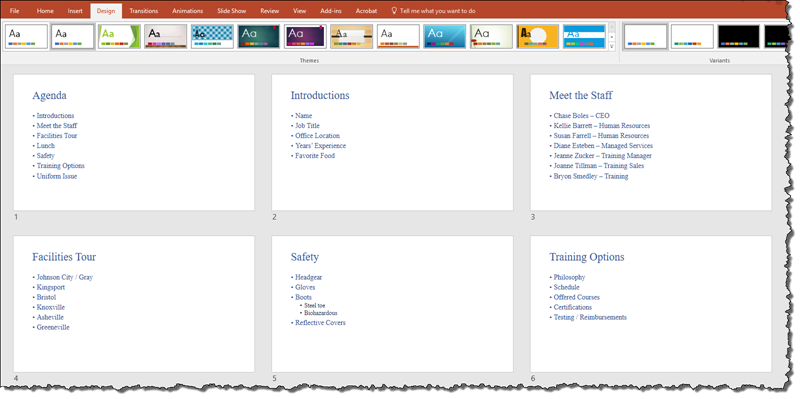
BONUS STEP #1 – Dressing up your slides
To easily apply artistic treatments to your slides, from the Design ribbon select a design of your choosing from the Themes gallery.

You now have an eye-catching presentation that took no time at all to make.
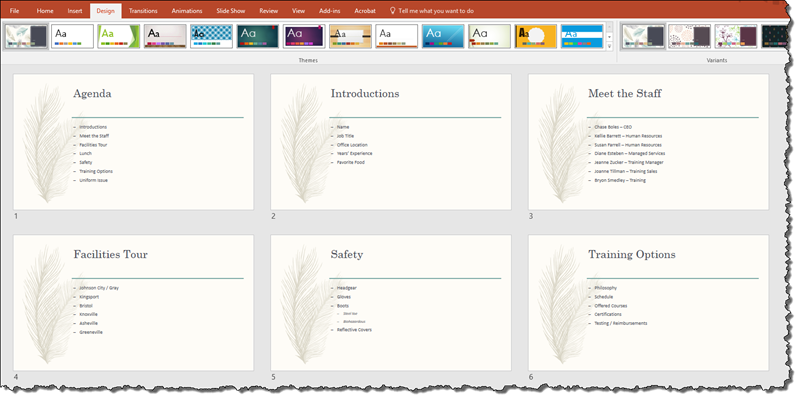
BONUS STEP #2 – Resetting slide layout and style
One of the unfortunate behaviors of importing slide content from a Word outline is that the text fonts and colors are based on the Word document and do not respond to design theme changes. To reset the slide to respond to theme changes, perform the following steps:
- Switch to the Normal view by selecting View (ribbon) –> Presentation Views (group) –> Normal

- Select the first slide in the thumbnails list (left side of screen)
- Scroll to the bottom of the thumbnails list
- While depressing the SHIFT key, select the last slide in the thumbnails list
- Right-click on any selected thumbnail and select Reset Slide
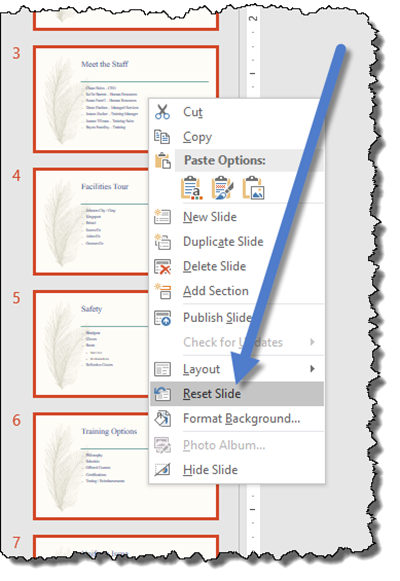
The slides will now respond to font and color changes when selecting different design themes.
